
Summary: If you’re facing issues with Disney Plus on your MacBook, it could be due to a variety of factors such as an unstable internet connection, incorrect DNS settings, VPN or proxy usage, ad blockers, certain browser extensions, corrupted cache files, browser-specific problems, or even Disney Plus server downtime. This guide provides comprehensive solutions to tackle these issues and ensure a smooth streaming experience.
Disney Plus is a treasure trove of entertainment. From Disney classics to Marvel blockbusters, it’s got it all. For MacBook users, it’s a portal to a world of magic and adventure.
But what happens when this portal refuses to open? When your MacBook seems to be on a strike against Disney Plus? It’s frustrating, to say the least.
Don’t worry, though. This guide is here to help. We’ll explore why Disney Plus might not be working on your MacBook. And more importantly, how to fix it. So, let’s get started and get you back to your favorite shows and movies!
Common Reasons Why Disney Plus Might Not Work on Your MacBook
There could be several reasons why Disney Plus isn’t working on your MacBook. Here are some of the most common ones:
- Outdated Operating System or Browser: Disney Plus requires the latest versions of macOS and web browsers for optimal performance. If your OS or browser is outdated, you might face issues.
- Internet Connection Issues: A stable and fast internet connection is crucial for streaming content on Disney Plus. If your internet is slow or unstable, it could cause problems.
- VPN or Proxy Services: Disney Plus might not work properly if you’re using a VPN or proxy service. This is especially true if you’re trying to access content not available in your region.
- Disney Plus Server Issues: Sometimes, the issue might not be on your end at all. If Disney Plus servers are down, you won’t be able to stream content.
- Account Issues: If there’s an issue with your Disney Plus account, such as a billing problem, it could prevent you from accessing the service.
- Content Restrictions: Some content on Disney Plus might not be available in your region due to licensing restrictions. If you’re trying to watch such content, you might face issues.
Remember, these are just common issues. The actual reason could be different in your case. The key is to identify the problem and then apply the appropriate fix.
Method 1: Checking Your Internet Connection
How to Check Your Internet Connection
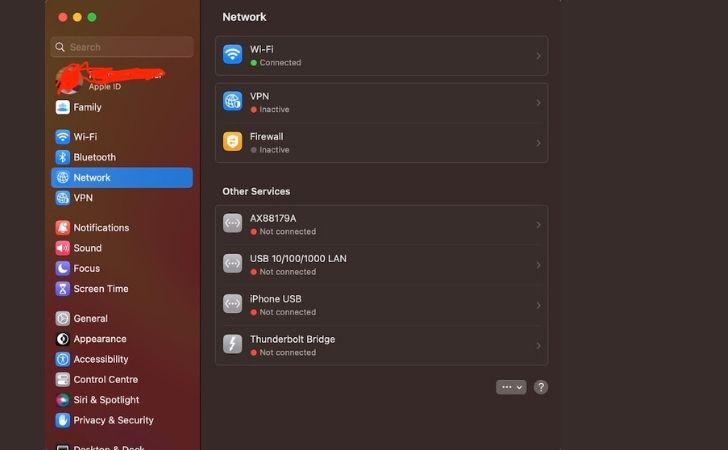
Checking your internet connection is quite straightforward on a MacBook. Here’s how you can do it:
- Click on the Apple menu at the top left corner of your screen.
- Select “System Settings.”
- Click on “Network.”
- Here, you can see your current connection status. If it says “Connected,” your internet should be working.
What to Do if Your Internet Connection is the Problem
If your internet connection is the problem, here are a few things you can try:
- Restart Your Router: Unplug your router, wait for a minute, and then plug it back in. This can often resolve connection issues.
- Move Closer to Your Router: If you’re too far from your router, your connection might be weak. Try moving closer to see if it improves.
- Contact Your ISP: If you’re still having issues, it might be a problem with your Internet Service Provider. Contact them for further assistance.
- Try a Wired Connection: If possible, try connecting your MacBook to your router with an Ethernet cable. Wired connections are usually more stable than wireless ones.
Method 2: Check Internet Speed
How to Check Your Internet Speed
Checking your internet speed is quite simple and can be done using various online tools. Here’s how you can do it:
- Open a web browser on your MacBook.
- Visit a reliable internet speed test website, such as Speedtest by Ookla.
- Click on the “Go” button to start the test.
- The test will measure your download speed, upload speed, and ping. These results will give you a good idea of your current internet speed.
What to Do if Your Internet Speed is Slow
If your internet speed is slow, here are a few things you can try:
- Restart Your Router: Unplug your router, wait for a minute, and then plug it back in. This can often resolve network issues.
- Move Closer to Your Router: If you’re too far from your router, your network connection might be weak. Try moving closer to see if it improves.
- Try a Wired Connection: If possible, try connecting your MacBook to your router with an Ethernet cable. Wired connections are usually more stable than wireless ones.
- Contact Your ISP: If you’re still having issues, it might be a problem with your Internet Service Provider. Contact them for further assistance. They might be able to provide solutions, such as upgrading your plan or troubleshooting your connection.
Method 3: Change DNS Server in Network Settings
How to Change DNS Server
Changing your DNS server on a MacBook is a straightforward process. Here’s how you can do it:
- Click on the Apple menu at the top left corner of your screen.
- Select “System Preferences.”
- Click on “Network.”
- Select your internet connection from the list on the left.
- Click on the “Advanced” button.
- Click on the “DNS” tab.
- Click on the “+” button to add a new DNS server. You can use public DNS servers like Google’s (8.8.8.8 and 8.8.4.4) or Cloudflare’s (1.1.1.1).
- Click “OK” and then “Apply.”
What to Do after Changing DNS Server
After changing your DNS server, you should restart your MacBook to ensure the changes take effect. Then, try accessing Disney Plus again to see if the issue has been resolved. If you’re still experiencing problems, you might want to try changing to a different DNS server or contacting Disney Plus Support for further assistance.
Method 4: Disable Ads Blocker & Browser Extensions
How to Disable Ads Blocker & Browser Extensions
Disabling ad blockers and other browser extensions on your MacBook can be done through your browser settings. Here’s how you can do it on popular browsers:
For Safari:
- Open Safari.
- Click on “Safari” in the menu bar at the top of the screen.
- Click on the “Settings”.
- Click on the “Extensions” tab.
- Uncheck the box next to each extension to disable it.
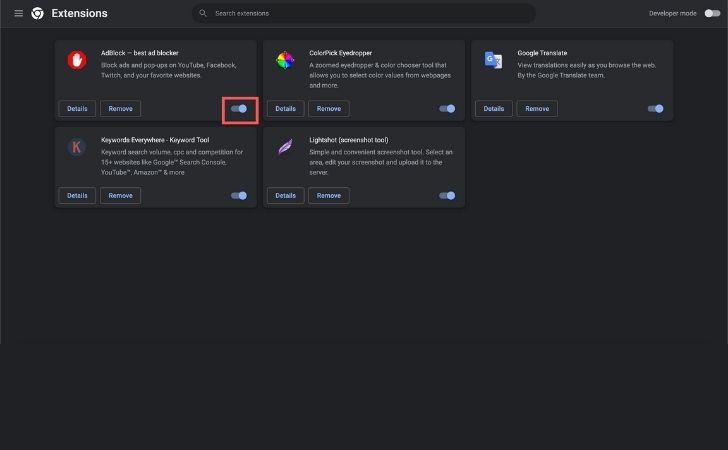
For Google Chrome:
- Open Google Chrome.
- Click on the three dots in the top right corner of the browser.
- Click on “More Tools,” then “Extensions.”
- Use the toggle switch to disable each extension.
For Firefox:
- Open Firefox.
- Click on the three lines in the top right corner of the browser.
- Click on “Add-ons.”
- Click on “Extensions.”
- Click on the three dots next to each extension and select “Disable.”
Remember to restart your browser after disabling extensions. Then, try accessing Disney Plus again to see if the issue has been resolved.
Method 5: Clear Browsers Cache and Cookies
Clearing your browser’s cache and cookies can help resolve many issues, including problems with streaming services like Disney Plus. Here’s how you can do it on popular browsers:
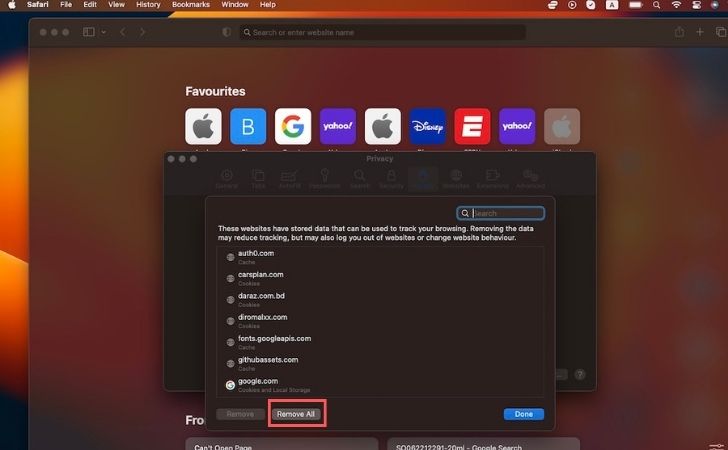
For Safari:
- Open Safari.
- Click on “Safari” in the menu bar at the top of the screen.
- Click on “Settings.”
- Click on the “Privacy” tab.
- Click on “Manage Website Data.”
- Click on “Remove All.”
For Google Chrome:
- Open Google Chrome.
- Click on the three dots in the top right corner of the browser.
- Click on “More Tools,” then “Clear Browsing Data.”
- Check the boxes for “Cookies and other site data” and “Cached images and files.”
- Click on “Clear Data.”
For Firefox:
- Open Firefox.
- Click on the three lines in the top right corner of the browser.
- Click on “Options.”
- Click on “Privacy & Security.”
- Scroll down to “Cookies and Site Data.”
- Click on “Clear Data.”
Remember to restart your browser after clearing the cache and cookies. Then, try accessing Disney Plus again to see if the issue has been resolved.
Method 6: Updating Your Browser and Operating System

How to Update Your Browser and Operating System
Updating your browser and operating system on a MacBook is a simple process. Here’s how you can do it:
Updating Your Browser:
- Open the browser you want to update.
- Look for the “Help” or “About” option in the menu. This is usually found in the top menu bar or under the three-dot menu in the top right corner.
- Click on “About [Browser Name]” or “Update [Browser Name].” The browser will automatically check for updates and install them.
Updating Your Operating System:
- Click on the Apple menu at the top left corner of your screen.
- Select “System Preferences.”
- Click on “Software Update.”
- If updates are available, click on “Update Now.”
What to Do if Updating Doesn’t Solve the Problem
If updating your browser and operating system doesn’t solve the problem, here are a few things you can try:
- Try a Different Browser: Sometimes, certain browsers might have issues with specific websites. Try accessing Disney Plus on a different browser to see if it works.
- Clear Your Browser Cache: Old or corrupted data in your browser cache can cause issues. Clear your browser cache and try again.
- Disable Browser Extensions: Some browser extensions can interfere with website functionality. Try disabling your extensions to see if it resolves the issue.
- Contact Disney Plus Support: If you’re still having issues, it might be a problem with Disney Plus itself. Contact their support team for further assistance.
Method 7: Disabling VPN and Checking Content Restrictions
How to Disable VPN and Check Content Restrictions
Disabling VPN:
- Click on the Apple menu at the top left corner of your screen.
- Select “System Preferences.”
- Click on “Network.”
- On the left-hand side, select your VPN service.
- Click on the “Disconnect” or “Turn Off” button.
Checking Content Restrictions:
Disney Plus content varies by region due to licensing agreements. If you’re trying to watch content that’s not available in your region, you might face issues. To check content restrictions:
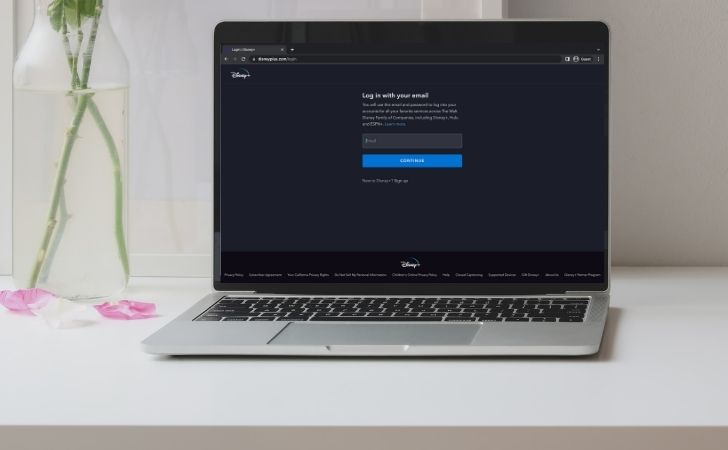
- Visit the Disney Plus website or app.
- Browse or search for the content you want to watch.
- If the content is not available, it will not appear in the search results or it might show a message indicating that it’s not available in your region.
What to Do if Disabling VPN and Checking Content Restrictions Doesn’t Solve the Problem
If disabling your VPN and checking content restrictions doesn’t solve the problem, here are a few things you can try:
- Check Your VPN Settings: If you’re using a VPN to access Disney Plus from a different region, make sure it’s set to a region where the content you want to watch is available.
- Try a Different VPN: Not all VPNs work with Disney Plus. If you’re having issues, try a different VPN service.
- Contact Disney Plus Support: If you’re still having issues, it might be a problem with Disney Plus itself. Contact their support team for further assistance.
Method 8: Checking Your Disney Plus Account
How to Check Your Disney Plus Account
Checking your Disney Plus account is quite straightforward. Here’s how you can do it:
- Visit the Disney Plus website or open the app.
- Click on your profile icon in the top right corner.
- Select “Account.”
- Here, you can check your account details, including your subscription status and payment information.
What to Do if Your Disney Plus Account is the Problem
If your Disney Plus account is the problem, here are a few things you can try:
- Update Payment Information: If your payment information is outdated or incorrect, it could cause issues. Update your payment information in the “Account” section.
- Check Subscription Status: Make sure your Disney Plus subscription is active. If your subscription has ended, you’ll need to renew it to continue watching.
- Contact Disney Plus Support: If you’re still having issues, it might be a problem with Disney Plus itself. Contact their support team for further assistance.
Method 9: Restarting Your MacBook
How to Restart Your MacBook
Restarting your MacBook is a simple process. Here’s how you can do it:
- Click on the Apple menu at the top left corner of your screen.
- Select “Restart.”
- Wait for your MacBook to shut down and turn back on.
What to Do if Restarting Doesn’t Solve the Problem
If restarting your MacBook doesn’t solve the problem, here are a few things you can try:
- Check for Updates: Make sure your MacBook’s operating system and your web browser are up to date. Outdated software can cause issues with Disney Plus.
- Try a Different Device: If possible, try accessing Disney Plus on a different device. If it works on another device, the issue might be with your MacBook.
- Contact Disney Plus Support: If you’re still having issues, it might be a problem with Disney Plus itself. Contact their support team for further assistance.
Method 10: Contacting Disney Plus Support
When to Contact Disney Plus Support
You should consider contacting Disney Plus Support when:
- You’ve tried all the troubleshooting steps and the problem persists.
- You’re experiencing issues that you can’t resolve on your own, such as account or billing problems.
- You’re receiving error messages that aren’t listed in the Disney Plus Help Center.
How to Contact Disney Plus Support
Here’s how you can contact Disney Plus Support:
- Visit the Disney Plus website.
- Click on the “Help” menu in bottom of the website.
- You can choose to start a live chat or call them directly. The contact number varies by region, so make sure to check the correct number for your location.
- Be ready to provide details about the issue you’re experiencing, including any error messages you’ve received and the steps you’ve taken to try to resolve the problem.
How to Fix Disney Plus Black Screen Problem on MacBook
The black screen issue on Disney Plus can be quite frustrating, especially when you’re ready to catch up on your favorite shows. Here are some steps you can take to resolve this issue:
- Check Your Internet Connection: A slow or unstable internet connection can often cause streaming issues. Try restarting your router or switching to a wired connection if possible.
- Clear Your Browser Cache and Cookies: Sometimes, corrupted cache files or cookies can cause issues with streaming services. Clear your browser’s cache and cookies and then try accessing Disney Plus again.
- Disable Ad Blockers and Extensions: Some ad blockers and browser extensions can interfere with Disney Plus. Try disabling them to see if that resolves the issue.
- Update Your Browser: An outdated browser can cause compatibility issues with Disney Plus. Make sure your browser is up to date.
- Check Disney Plus Servers: If Disney Plus servers are down, you might experience a black screen. Check the Disney Plus social media pages or a website like DownDetector to see if there are any reported outages.
- Contact Disney Plus Support: If you’ve tried all the above steps and are still experiencing a black screen, it might be time to contact Disney Plus Support for further assistance.
Conclusion
Experiencing issues with Disney Plus on your MacBook can be frustrating, but most problems can be resolved with a bit of troubleshooting. Whether it’s checking your internet connection, updating your browser, or contacting Disney Plus Support, there’s usually a solution available. Remember, the key is to approach the problem methodically and try different solutions until you find the one that works. Happy streaming!